Oven Cleaning in a Simple, Effective, and Safe Way for a Better Kitchen
Keeping your kitchen fresh and hygienic starts with one essential task: oven cleaning. A clean oven not only improves the appearance of your kitchen, but also helps food cook more evenly, reduces smoke and odors, and supports a healthier cooking environment. Whether you cook every day or only on weekends, oven cleaning is one of those household tasks that can quickly make a big difference.
Many people delay oven cleaning because it feels messy, time-consuming, or physically demanding. However, with the right approach, oven cleaning can become much easier and far less stressful. From removing baked-on grease to tackling burnt food spills, there are several methods that make oven maintenance more manageable and effective.
In this article, you’ll find practical advice, useful tips, and expert-style information on how to approach oven cleaning efficiently. You’ll also learn why regular cleaning matters, what tools help most, and how to keep your appliance in better condition for longer.
Why Oven Cleaning Matters More Than You Think

Many homeowners think oven cleaning is only about appearance, but it affects much more than that. A dirty oven can create smoke, unpleasant smells, and even affect the flavor of the food you prepare. Grease buildup can burn during cooking, leaving residue on dishes and producing a less pleasant kitchen environment.
Regular oven cleaning also helps the appliance run more efficiently. When grime accumulates on heating elements, fans, and interior surfaces, your oven may need to work harder to maintain the correct temperature. Over time, this can lead to uneven cooking and unnecessary wear.
Another important factor is kitchen hygiene. Food particles left inside the oven can attract pests and contribute to bacteria growth, especially if spills are left for long periods. A consistent cleaning routine supports a cleaner and safer home overall.
Key benefits of regular oven cleaning
- Improves cooking performance and heat distribution
- Reduces smoke, odors, and burnt food smells
- Helps extend the lifespan of the appliance
- Supports better kitchen hygiene
- Makes the oven easier to maintain over time
Signs Your Oven Needs Cleaning
It is not always obvious when oven cleaning is due, especially if the appliance is used regularly. Still, there are several signs that indicate it’s time to give the interior a thorough refresh. Recognizing these early can help you avoid tougher buildup later.
If your oven produces smoke when you bake or roast, this is often a sign of grease accumulation or food debris burning at high heat. Similarly, if you notice a strong lingering odor even when the oven is empty, the interior likely needs attention.
Visible stains, dark patches on the oven walls, and a sticky feeling on racks or glass doors are all clear indicators that oven cleaning should not be postponed. The longer residue sits, the harder it becomes to remove.
Common warning signs
- Smoke during preheating or cooking
- Burning smells from previous spills
- Dark grime on interior surfaces
- Greasy oven racks
- Cloudy or stained glass door panels
Tools and Supplies That Make Oven Cleaning Easier

Before you begin oven cleaning, gathering the right tools can save time and reduce frustration. You do not need expensive products to get good results. Often, a few basic supplies are enough to handle everyday buildup effectively.
Helpful items include microfiber cloths, a non-scratch sponge, rubber gloves, a plastic or silicone spatula, a spray bottle, and a bowl for mixing cleaning solutions. For deeper oven cleaning, you may also want a soft-bristle brush or an old toothbrush for corners and edges.
Many people use store-bought oven cleaners, while others prefer natural cleaning mixtures such as baking soda and vinegar. Both approaches can work well depending on the level of grime and your preference for chemical-based or eco-friendlier solutions.
Basic oven cleaning toolkit
- Microfiber cloths
- Soft sponge or non-abrasive scrub pad
- Rubber gloves
- Plastic scraper or spatula
- Spray bottle
- Baking soda and white vinegar
- Commercial oven cleaner if needed
Tip: Always read the appliance manual before using any product, especially on self-cleaning ovens or special coatings.
How to Approach Oven Cleaning Safely
Safety should always come first when performing oven cleaning. Ovens can be hot, surfaces can be sharp, and some cleaning agents may produce fumes if used incorrectly. Preparing properly reduces risk and makes the job smoother from start to finish.
Start by switching the oven off and allowing it to cool completely. Remove racks, trays, and any accessories before applying cleaning solutions. If you are using a commercial product, make sure the room is well ventilated by opening windows or turning on the extractor fan.
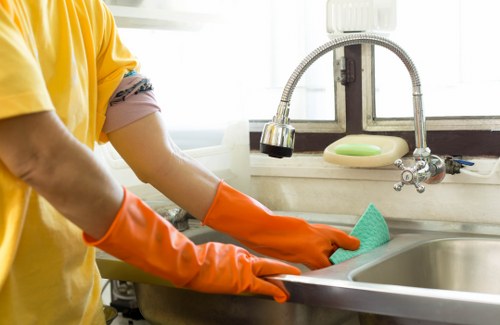
Wear gloves to protect your hands from grease, chemicals, and residue. If the oven has heavy buildup, avoid using metal scrapers or abrasive pads that could damage the interior finish. A careful oven cleaning method usually produces better long-term results than aggressive scrubbing.
Important safety reminders
- Turn off the oven and let it cool first.
- Remove racks, trays, and accessories.
- Ventilate the area well.
- Use gloves and avoid harsh scraping.
- Never mix cleaning chemicals unless labels clearly say it is safe.
Step-by-Step Oven Cleaning for Everyday Dirt

For routine oven cleaning, a simple step-by-step process often delivers excellent results. This method is ideal for light to moderate grease, food splashes, and everyday buildup. It helps restore freshness without requiring a major deep-cleaning effort.
Begin by removing loose crumbs and debris from the base of the oven. A handheld vacuum or dry cloth can help collect particles quickly. Next, create a cleaning paste using baking soda and a little water until it forms a spreadable texture.
Apply the paste to the oven interior, avoiding heating elements, vents, and fans. Let it sit for several hours or overnight if needed. Then wipe away the paste using a damp cloth. If residue remains, spray a little vinegar over the area to help lift it before wiping again.
Easy routine cleaning process
- Remove racks and loose debris.
- Mix baking soda with water into a paste.
- Spread the paste across the interior surfaces.
- Let it sit to break down grime.
- Wipe clean with a damp microfiber cloth.
- Use vinegar for stubborn residue.
- Dry the oven thoroughly before use.
This style of oven cleaning is especially useful when done regularly, because grease has less time to harden. That means less effort each time and a much cleaner appliance overall.
Deep Oven Cleaning for Stubborn Grease and Burnt-on Spills
Sometimes routine maintenance is not enough, and a deeper oven cleaning is required. Burnt-on spills, thick grease, and old food residue can build up over months, making the oven look dull and smell unpleasant. In these cases, a more thorough approach is needed.
For heavy grime, a commercial oven cleaner may be effective, especially on tough stains inside the cavity or on heavily soiled racks. Follow the instructions carefully and avoid overapplying product. Let it work for the recommended amount of time, then wipe away the loosened residue with damp cloths.
If you prefer a natural option, baking soda and vinegar can still help, though it may take longer and require repeated treatment. Some stubborn areas may need a second application or gentle scraping with a plastic tool. Patience is important in deep oven cleaning, since rushing can lead to scratches or incomplete results.
When deep cleaning is necessary
- Heavy smoke appears during cooking
- Grease stains are thick and dark
- Food spills have been baked on repeatedly
- The oven smells unpleasant even when unused
- Routine cleaning no longer works well
Cleaning Oven Racks, Doors, and Accessories

Effective oven cleaning goes beyond the main interior. Racks, doors, trays, and removable accessories all collect grease and food residue over time. If these parts are neglected, the oven can still look and smell dirty even after the main cavity is cleaned.
Oven racks can usually be soaked in warm water with dish soap or a mild degreasing solution. After soaking, use a sponge or soft brush to loosen residue. For stubborn buildup, baking soda paste can be applied to the racks before scrubbing gently.
The oven door, especially the glass panel, often needs special attention. A soft cloth and a suitable cleaning mixture can remove smears and brown patches. Be sure to clean around the edges and handle area, where grease fingerprints often collect.
Cleaning different oven components
- Racks: Soak, scrub, and rinse thoroughly
- Door glass: Use a non-abrasive cleaner and microfiber cloth
- Trays: Remove baked-on residue before reusing
- Knobs and handles: Wipe regularly to prevent buildup
Natural vs Commercial Oven Cleaning Products
When it comes to oven cleaning, many people debate whether natural or commercial products are better. The answer depends on the type of grime, how much time you have, and whether you prefer eco-friendlier cleaning methods.
Natural solutions like baking soda, vinegar, lemon, and hot water are popular because they are inexpensive and less harsh. They work well for light to moderate dirt and are a good choice for regular maintenance. These methods are also appealing to households that want to reduce strong chemical exposure.
Commercial cleaners, on the other hand, are often more powerful and can be useful for stubborn grease or older buildup. However, they may have stronger fumes and require careful handling. For many homeowners, a mixed approach works best: natural oven cleaning for routine care and stronger products for occasional deep cleaning.
Choosing the right method
- Natural cleaning: Best for routine maintenance and light grease
- Commercial products: Better for heavy buildup and burnt residue
- Combination approach: Practical for varying cleaning needs
Always test a small area first if you are unsure how a product will react with your oven’s surface.
How Often Should You Clean Your Oven?
The frequency of oven cleaning depends on how often you cook and what types of meals you prepare. If you bake frequently, roast meats, or use dishes that tend to bubble over, you may need to clean more often than someone who uses the oven only occasionally.
As a general rule, light cleaning every few weeks helps prevent buildup, while a deeper oven cleaning every few months can keep the appliance in strong condition. If you notice smoke, strong odors, or visible residue sooner, do not wait for a scheduled date.
Maintaining a simple habit of wiping spills when they happen is one of the easiest ways to reduce future work. A small spill is much easier to remove the same day than after it has been heated dozens of times.
Suggested cleaning schedule
- After each use: Wipe small spills once the oven is cool
- Weekly or biweekly: Remove crumbs and clean visible residue
- Monthly: Do a more detailed surface clean
- Every 2–4 months: Perform a deeper oven cleaning as needed
Common Mistakes to Avoid During Oven Cleaning
Even though oven cleaning seems straightforward, certain mistakes can make the process less effective or even damage the appliance. Knowing what to avoid can save time and protect your oven in the long run.
One of the most common mistakes is cleaning while the oven is still warm. This can create safety risks and may cause cleaning products to evaporate too quickly. Another problem is using sharp tools or abrasive pads that scratch the interior finish.
People also sometimes use too much product, thinking it will improve results. In reality, excess cleaner can leave behind residue and require more effort to remove. The best oven cleaning results usually come from controlled application, proper dwell time, and careful wiping.
Mistakes to avoid
- Cleaning a hot oven
- Using metal scrapers on delicate surfaces
- Applying too much cleaner
- Skipping ventilation
- Ignoring the racks and door
Keeping Your Oven Cleaner for Longer
After oven cleaning, a few simple habits can help keep the appliance fresh for longer. Prevention matters just as much as cleaning itself, especially if you want to minimize deep-cleaning sessions.
Use oven-safe trays to catch drips when roasting or baking messy dishes. Cover casseroles when possible to reduce splatter. Wiping spills promptly after the oven cools is one of the easiest ways to reduce baked-on buildup. It is also helpful to give the door and handles a quick wipe during regular kitchen tidying.
Good habits like these make oven cleaning less demanding and help preserve the appliance’s appearance. Over time, the oven stays more efficient, more hygienic, and much easier to care for.
Simple maintenance habits
- Wipe spills as soon as the oven is cool
- Use trays or liners where appropriate
- Avoid overfilling dishes that may bubble over
- Keep racks and doors on a regular cleaning schedule
- Do a quick inspection after baking messy foods
Final thought: If you want a cleaner kitchen and better cooking results, make oven cleaning part of your regular home routine. For busy households, professional help can also be a smart choice. Book your service now or contact us today to keep your kitchen looking its best.